Ever stared at that uneven patch in your yard and dreamed of transforming it into a stunning patio? You’re not alone. Many homeowners in the Metro Atlanta area share your vision but feel stuck on how to lay pavers.
This guide is your shovel to start digging into the process. We’ll walk you through the essential steps for laying pavers, from planning and drainage to the final sand sweep.
By following our advice, you’ll not only enhance your outdoor living space but also prevent water pooling issues that can ruin a good patio. Get ready to create a durable and beautiful extension of your home, one paver at a time.
How to Lay Pavers: Step-by-Step Guide for a Perfect Patio
Understanding Paver Patios
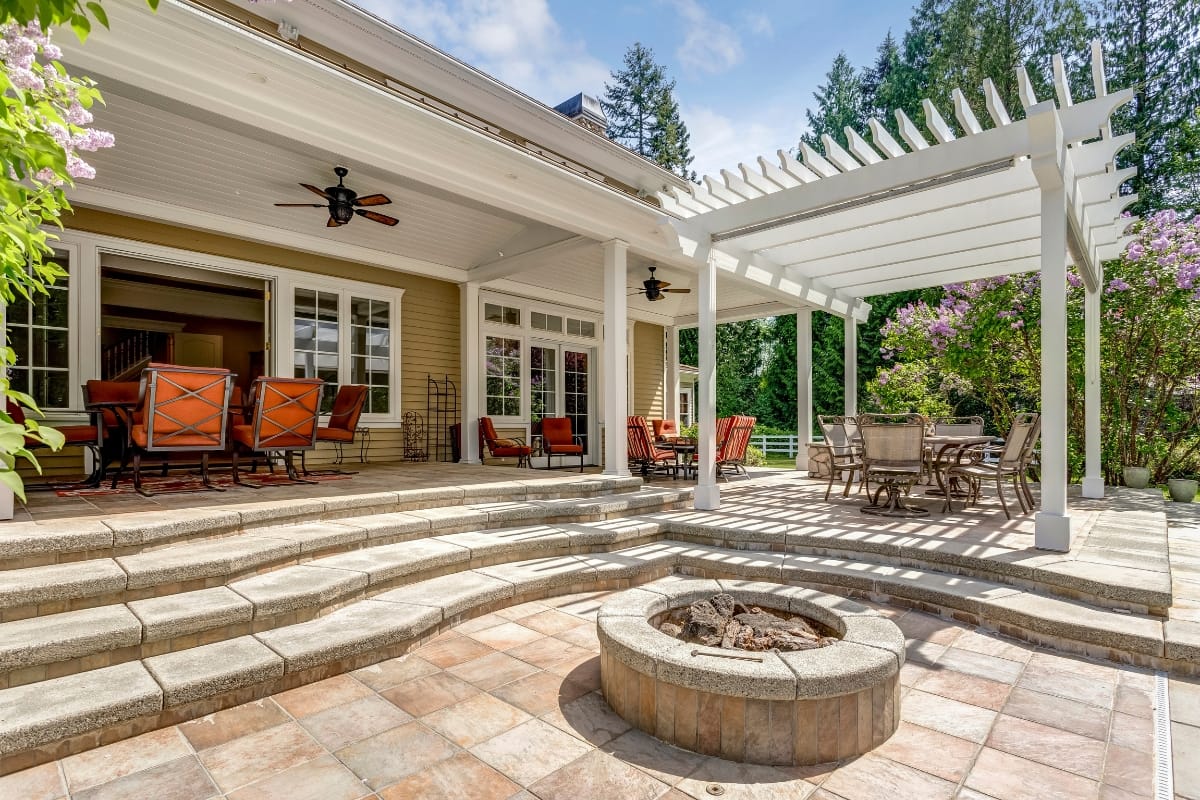
Ready to give your outdoor space a facelift? Pavers are your go-to for a patio that’s as sturdy as it is stunning. You’ll find a variety of materials, from sleek concrete to natural stone, each with its unique perks.
And when it comes to style and color, the sky’s the limit—choose a vibe that’s all you. We’ll walk you through selecting the perfect pavers and prepping your space with gravel and soil, all the way to the nitty-gritty of compacting for a flawless finish.
Advantages of Choosing Pavers for Your Patio
When you choose pavers for your patio, you’re opting for durability and versatility. Unlike a slab of concrete that can crack over time, a paver patio is made up of many individual pieces—brick, rock, or crushed stone—that work together to handle the shifts and changes in the landscape.
This means less worry for you about repairs and maintenance. Plus, if a paver does get damaged, you can simply replace that one piece, not the whole patio.
Imagine the freedom to create a patio that’s a true reflection of your style. With pavers, you can mix and match colors and textures to complement your home’s exterior.
Whether you’re laying down a classic brick pattern or a modern concretedesign, pavers offer a rock-solid foundation that’s as functional as it is beautiful. Here’s how you can get started:
- Choose your paver material: brick, concrete, or natural stone.
- Decide on the color and texture that best suits your home’s aesthetic.
- Plan the layout, keeping in mind the size and shape of your outdoor space.
Different Types of Paver Materials
When you’re ready to transform your garden into a personal oasis, the right paver material is key.
Brickpavers, with their classic charm, are a favorite for that timeless look, while concretepavers offer a more modern feel and come in a variety of finishes.
If you’re after something that whispers elegance, natural stone pavers, like slate or limestone, bring a piece of the earth’s artistry right to your doorstep.
Whichever you choose, you’ll need a sturdy shovel for excavation, and masonrysand or stone dust for the screed layer, ensuring a level base for your pavers.
Now, let’s talk about the nitty-gritty of laying pavers. You’ll want to start with a solid foundation, which means a well-compacted sub-base topped with a screed layer to keep everything level.
This is where stone dust comes in handy, giving you a fine, adjustable bed to set your pavers into. With a steady hand and a keen eye, you’ll use your shovel to spread the dust, creating a smooth, flat surface that’s ready for those gorgeous pavers. Remember, a little patience here means a patio that stays put and looks great for years to come.
Selecting the Ideal Paver Style and Color
Choosing the right style and color for your pavers is like picking the perfect outfit for your driveway—it’s all about matching your home’s personality with functionality.
You want a hardscape that not only looks good but also stands up to the test of time. Think about the hues that complement your home’s exterior and consider the visual impact of the pavers‘ texture under different lighting conditions. Your choice sets the stage for a welcoming entrance that’s uniquely yours.
Now, when it comes to laying those pavers down, you’ve got to get your hands on the right tools. A trusty pipe for creating level guides and a tool for soil compaction are essentials.
These aren’t just tools; they’re your allies in achieving that crisp, even hardscape you’re dreaming of. With a keen eye for detail and the right equipment, you’ll ensure each paver sits snug and secure, ready to greet every footstep and tire roll with unwavering stability.
Planning Your Patio Project
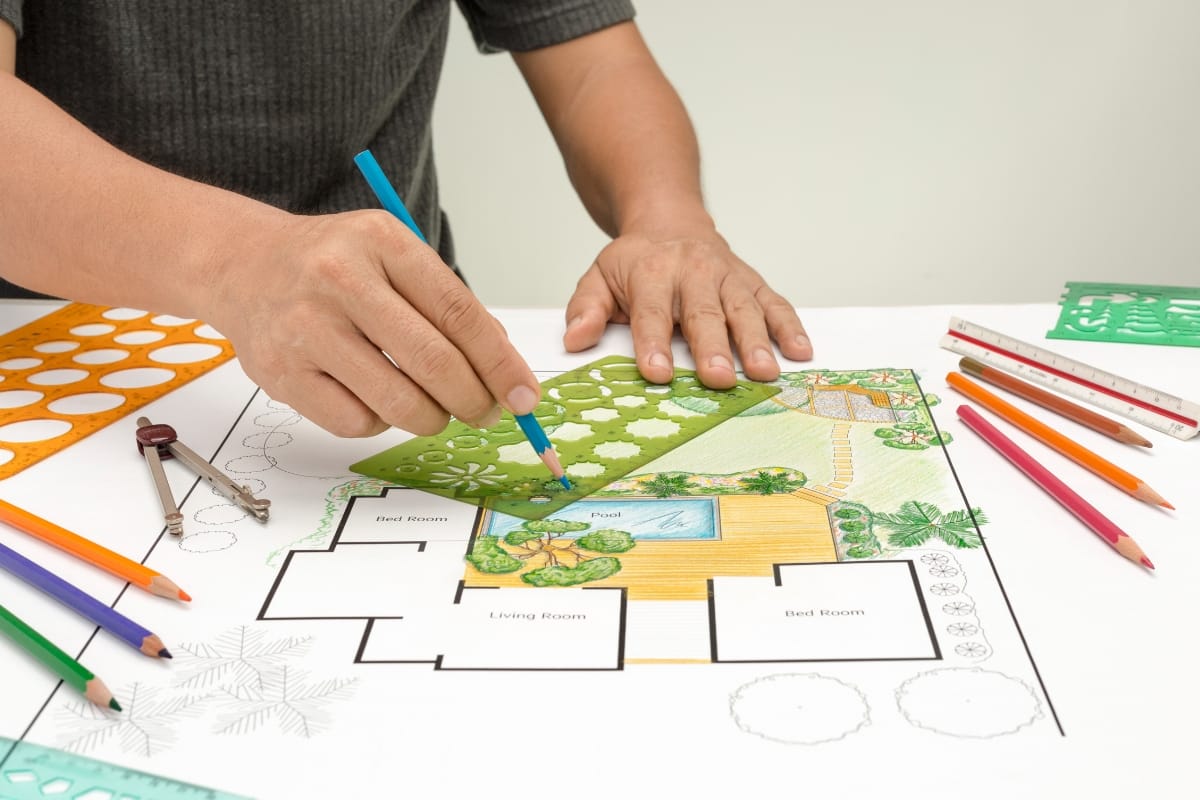
Before you dive into laying pavers for your patio, let’s plan it out. Start by assessing your space with a tape measure to understand the bed where your patio will sit.
Next, grab a metalrake and gardenhose to design the layout and pattern that will make your outdoor area pop. You’ll want to estimate costs and gather all your supplies to ensure a smooth project flow. These steps are your blueprint for a patio that’s not only eye-catching but also a testament to your handiwork.
Assessing the Space and Measuring Accurately
Before you lay the first paver, you’ve got to know the lay of the land. Grab your tape measure and get the length and width of your space down to the foot.
This isn’t just busy work; it’s about making sure you’ve got enough materials and that your foundation will be solid. Think of it like setting up a chessboard—you need to know the playing field before you make your move.
Once you’ve got your measurements, it’s time to sketch out your vision. Use plastic stakes and woodpaint sticks to mark the corners of your future patio.
This step is crucial because it gives you a real-world outline of your project, ensuring that every paver has its place on a well-prepared foundation. It’s like drawing the blueprints for your outdoor masterpiece.
Designing the Layout and Pattern
When you’re painting the canvas of your outdoor space, the layout and pattern of your pavers are like the brushstrokes that define the masterpiece.
Think of each paver as a piece of clay in your hands, ready to be molded into the perfect path or patio. Whether you’re envisioning a winding walkway that leads to a cozy nook or a grand patio fit for lavish gatherings, sketching out your design beforehand ensures that every piece fits just right.
It’s like laying down the lines before the construction begins, setting the stage for a retaining wall or fire pit that seamlessly integrates with your vision.
As you plot out the pattern, consider the interplay of light and shadow across different textures. The way the sun hits a glossy finish compared to a matte surface can dramatically alter the ambiance of your outdoor retreat.
You’re not just laying pavers; you’re crafting an experience, a backdrop for memories to be made. With a clear design in mind, you’ll navigate the construction phase with confidence, knowing that each step brings you closer to the outdoor living space you’ve always wanted.
Estimating Costs and Gathering Supplies
Before you start to install pavers for your new patio, you’ll want to get a handle on the costs. This means tallying up the price of materials, from the pavers themselves to the sand and gravel needed for the base.
Don’t forget to factor in the tools you’ll need for the job—if you’re going DIY, you might need to purchase or rent equipment like a compactor or a wet saw. It’s smart to add a little extra to your budget for those just-in-case scenarios:
- Calculate the total square footage of your patio to estimate the number of pavers needed.
- Include the cost of base materials like gravel and sand, which provide a stable foundation.
- Account for additional supplies such as edging materials and sealant for the finishing touch.
Once you’ve got your budget set, it’s time to gather your supplies. You’re not just installing pavers; you’re laying the groundwork for countless outdoor memories.
Make sure you’ve got everything on hand before you begin, from the pavers and base materials to the smaller items like spacers and a mason’s line. This way, you can keep your project moving smoothly without any frustrating pauses to run to the store:
Preparing the Site for Your Paver Patio Installation
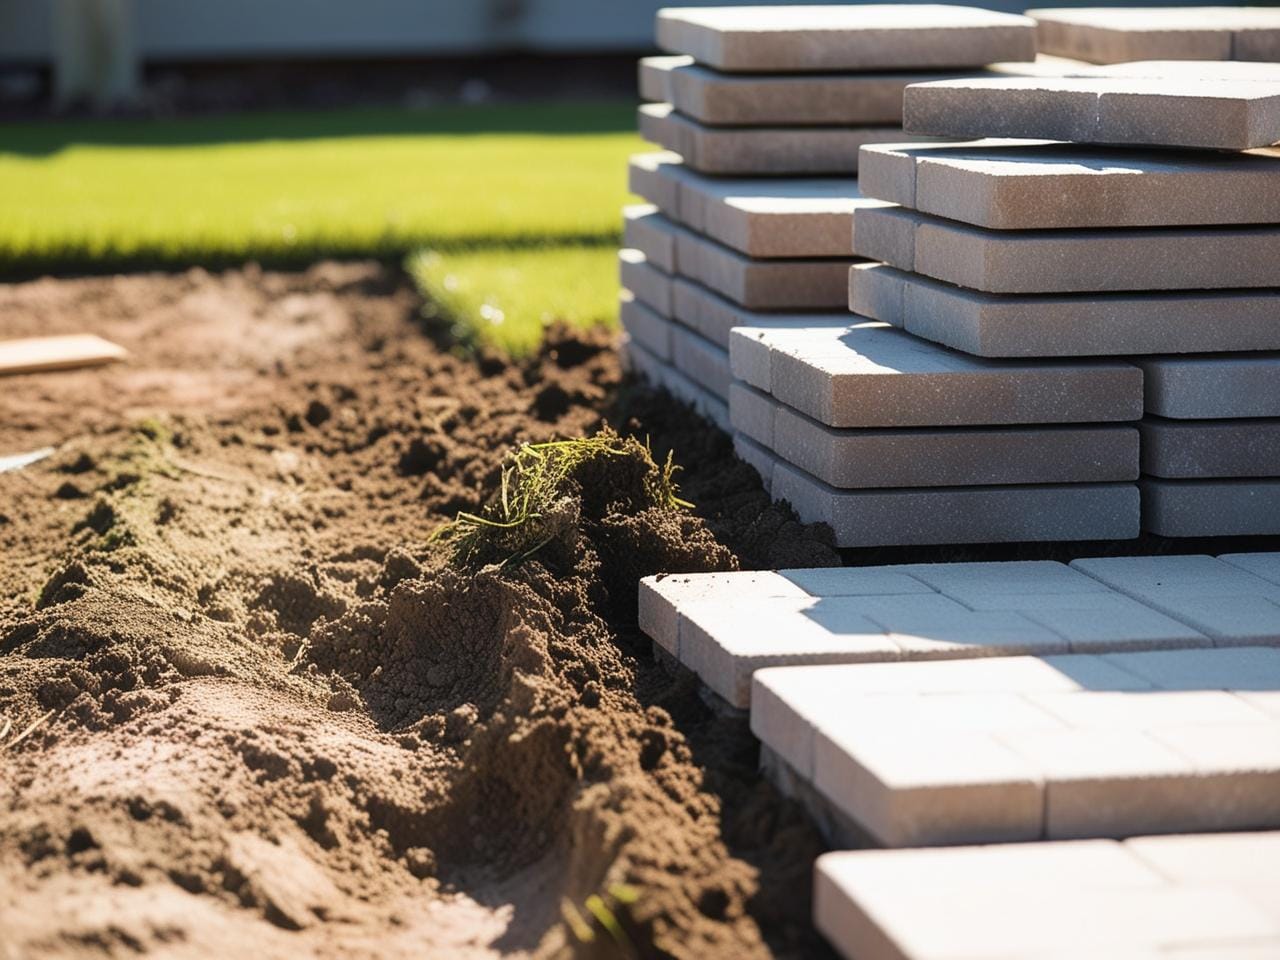
Alright, let’s roll up our sleeves and prep your patio site. First up, you’ll mark the patio boundaries to define your work area—think of it as drawing your own blueprint.
Then, you’ll dig into excavating the area to just the right depth, making room for the base materials. And don’t forget, ensuring a proper slope for drainage is key; you want to avoid a pool party unless that’s the plan!
With these steps, you’ll create a solid foundation that keeps those pavers snug in their joints, and your patio looking sharp for years. Grab your broom, limestone, and a trusty inchreference, and let’s get started.
Marking the Patio Boundaries
Before you lay a single paver, it’s crucial to mark the boundaries of your future patio or walkway. This step is about precision: you’ll want to use steel stakes and string to outline the area, ensuring every edge is straight and every corner is squared.
It’s not just about aesthetics; a well-defined boundary helps prevent erosion and provides a guideline for the paver base and slope, setting the stage for a patio that’s both beautiful and durable.
Getting the slope right is key to avoiding water pooling on your new pavers. Aim for a gentle slope away from your home or any structures, about a quarter inch per foot, to ensure proper drainage.
This might seem like a small detail, but it’s one that makes a big difference in the longevity of your patio. With the boundaries marked and the slope set, you’re ready to move on to laying the paver base: a critical foundation for your project.
| Step | Action | Purpose |
|---|---|---|
| 1 | Mark boundaries with stakes and string | Define the project area and ensure straight edges |
| 2 | Measure and set the slope | Ensure proper drainage and prevent water damage |
Excavating the Area to the Proper Depth
When you’re ready to roll up your sleeves and start digging, remember that the depth of your excavation is crucial. You’ll want to remove the top layer of grass, debris, and any pesky roots that could interfere with your pavers.
Use a sturdy rake to clear the area and ensure a clean workspace. Then, grab your spirit level to check that the base has a consistent slope for drainage. This step is about setting the stage for a patio that’s as level as it is durable.
As you dig, aim for a depth that allows for a solid base layer, room for sand, and the pavers themselves—usually about 7 to 8 inches.
It’s a bit like preparing a bed for planting; you need to get the depth just right for everything to come together smoothly. Keep that spirit level handy to maintain an even surface, and soon you’ll have a well-prepped area that’s ready for the next step in creating your dream patio.
Ensuring Proper Slope for Drainage
Getting the slope right is a game-changer for your patio‘s longevity. With a gardenhose in hand, you’ll gently water the area to settle the soil, then use a long, straight board and a level to check the height.
Aim for a subtle slope of about a quarter inch per foot to whisk water away from your home. This isn’t just about avoiding puddles; it’s about protecting your patio from water damage that can lead to costly repairs down the line.
Once you’ve nailed the slope, it’s time to lay down landscape fabric to block those pesky weeds. Then, grab your hammer or mallet and start securing the fabric edges with stakes.
This step is crucial: it’s like setting up a barrier that keeps your patio looking neat and maintenance-free. Plus, it’s a satisfying moment, knowing you’re building a solid foundation that’ll stand the test of time.
- Settle the soil with water using a hose.
- Check the height and slope with a level and straight board.
- Secure landscape fabric with a hammer or mallet to prevent weed growth.
Next, we lay the base, the foundation that promises stability and longevity.
Installing the Base Material
Now that you’ve marked your patio‘s perimeter, it’s time to lay the groundwork in your yard. Adding crushed stone or gravel forms the first layer of your project, setting the stage for a patio that’s ready to face the elements, come rain or shine.
You’ll need to compact this base layer thoroughly, ensuring a stable foundation that won’t shift or sink. Grab your chisel and cement your success by checking the level of the base surface.
This step is crucial for a patio that’s as level as it is long-lasting, so let’s dive into the details and make sure you get it just right.
Adding Crushed Stone or Gravel
Starting your patio project on the right foot means laying down a solid base of crushed stone or gravel. This isn’t just about filling space; it’s about creating a stable bed that prevents your pavers from shifting.
Think of it as the foundation of your home—it needs to be strong and level. Use a straight edge and electrical conduit to ensure an even layer that’s compacted just right, setting the stage for a patio that’s as durable as it is beautiful.
After you’ve spread the crushed stone or gravel, it’s time to bring in the geotextile fabric. This unsung hero works quietly beneath the surface, separating the base from the soil and boosting the longevity of your patio.
It’s like a security blanket for your pavers, keeping them safe from unpredictable earth movements. With the geotextile fabric in place, you’re ready to edge closer to a flawless finish, with a curb or wall to neatly frame your handiwork.
Compacting the Base Layer Thoroughly
Think of compacting the base layer as the equivalent of setting a sturdy foundation for your dream home. You wouldn’t skimp on that, right? So, grab your wheelbarrow and start spreading an even layer of crushed stone or gravel.
Once it’s down, it’s time to bring out the big guns—a plate compactor. This isn’t just about pressing down the stones; it’s about creating a solid, unmovable base that’ll support your pavers through thick and thin. And trust me, the satisfaction of watching that concrete slab of a base come together is second to none.
After you’ve given your base a good once-over with the compactor, it’s crucial to double-check for any low spots. If you find any, don’t sweat it—just fill them in with a bit more gravel and run the compactor over them again.
This attention to detail ensures your patio won’t have any unwelcome dips or bumps down the line. And when it’s time for the final touch, a bit of pressure washing will clear away any leftover dust or debris, leaving you with a clean slate ready for those beautiful pavers.
Checking the Level of the Base Surface
When you’re knee-deep in your home improvement project, checking the level of your base surface is like ensuring your cake is baked evenly before icing it.
You wouldn’t want your fire pit or patio furniture teetering on an uneven surface, right? So, grab your circular saw with a diamond blade to trim any high spots on your edging, and use a long level to confirm the base is flat and ready for the next layer. This step is crucial for a design that looks professional and stays put.
Imagine the pride you’ll feel when you step back and see a perfectly level base, the foundation of your outdoor transformation. It’s all about the details, and ensuring a level base means you’re setting yourself up for success.
Use a straight edge to check for dips and valleys, filling them in with more material as needed. This meticulous approach is what separates a DIY job from a true home improvement masterpiece.
Next comes the sand, the bed where pavers find their grip.
Applying the Sand Layer
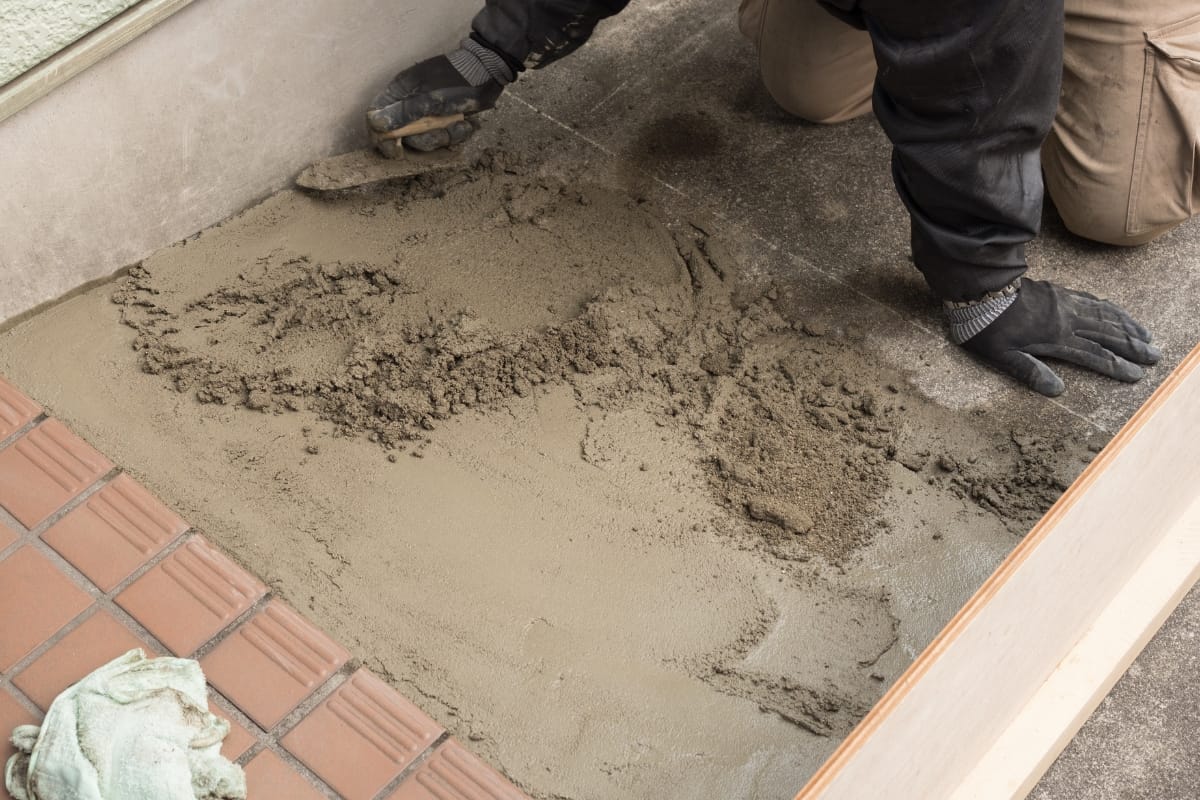
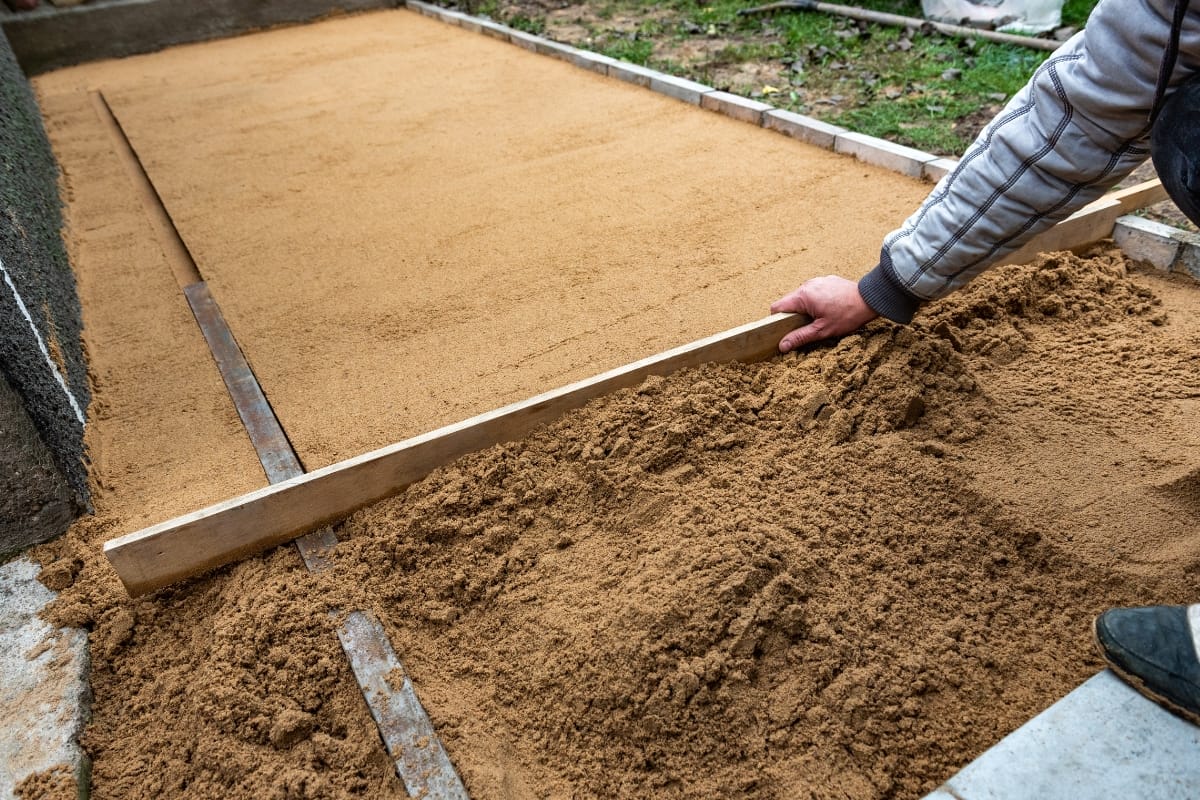
Alright, you’re on the home stretch of your patio project, and it’s time to focus on the sand layer. This is where your spade and brush come into play, ensuring the bedding sand is spread evenly, setting the stage for a smooth surface.
You’ll learn how to screed the sand just right, avoiding any pressure that could disturb the layer. Keeping your budget in mind, these steps are key to a professional-looking finish without any extra dirt or hassle. Let’s dive into the details and get those pavers laid out perfectly.
Spreading Bedding Sand Evenly
Spreading your bedding sand evenly is a step you can’t afford to overlook if you’re aiming for that picture-perfect patio. Think of it as laying down a plush carpet before setting your furniture; it’s all about creating a smooth, even base for your pavers.
You’ll want to use a straight edge to guide you, ensuring the sand is distributed uniformly across the entire area.
This careful preparation is key to avoiding dips and rises that could disrupt the stability of your patio, and it’s a smart way to keep those “how much does it cost to install pavers” questions to a minimum by doing it right the first time.
When you’re knee-deep in sand, remember that a little finesse goes a long way. You’re not just tossing sand around; you’re setting the stage for each paver to fit snugly and stay put. By using a screed board, you’ll create a flat surface that’s crucial for a level patio.
This attention to detail can save you from future headaches and additional costs, keeping that “how much to install pavers per square foot” budget in check. Plus, it’s the kind of groundwork that ensures your patio will look as good as new for years to come, making every penny of your paver installation cost well spent.
Screeding the Sand to Create a Smooth Surface
When you’re puzzling over how to lay pavers on dirt for that dream patio, screeding the sand is a step you can’t skip. Imagine smoothing out the wrinkles on a bedsheet; that’s what screeding does for your sand layer.
It’s a simple yet precise move that sets you up for success, ensuring a flat and even surface that’s crucial for the stability of your pavers. And when you’re wondering how much it is to install pavers, remember, a well-screeded base can save you from costly adjustments later on.
So, how do you install pavers with the finesse of a pro? It starts with a screed board and a steady hand. Gently drag the board across the sand, using a sawing motion to level it out without pressing too hard.
This technique helps avoid disturbing the compacted base underneath, which is key to a solid finish. By mastering this step, you’re not just laying pavers; you’re crafting a durable, flat surface that’ll have everyone asking, “How much does it cost to install paver patios that look this good?”
Avoiding Disturbance of the Sand Layer Before Laying Pavers
When you’re wondering how do you lay a patio with precision, keeping the sand layer undisturbed is crucial. After screeding, tread lightly and use plywood sheets to distribute your weight if you need to walk on it.
This way, when you’re ready to lay pavers for a patio, the surface will be as smooth as glass, ensuring a stable base for your pavers to rest on. It’s all about the prep work to avoid any sinking or misalignment that could throw off your entire project.
So, how do I lay pavers without messing up the sand? It’s simple: start from a corner and work your way out, gently placing each paver down without dragging it. If you’re thinking, “How do I install patio pavers like a pro?” remember that patience and careful placement are your best tools. By avoiding any disruption to the sand, you’re setting yourself up for a patio that’s not only visually appealing but also structurally sound.
| Step | Action | Result |
|---|---|---|
| 1 | Use plywood sheets to walk on sand | Prevents disturbance and keeps the surface level |
| 2 | Gently place pavers without dragging | Ensures a stable and aligned patio surface |
Laying the Pavers
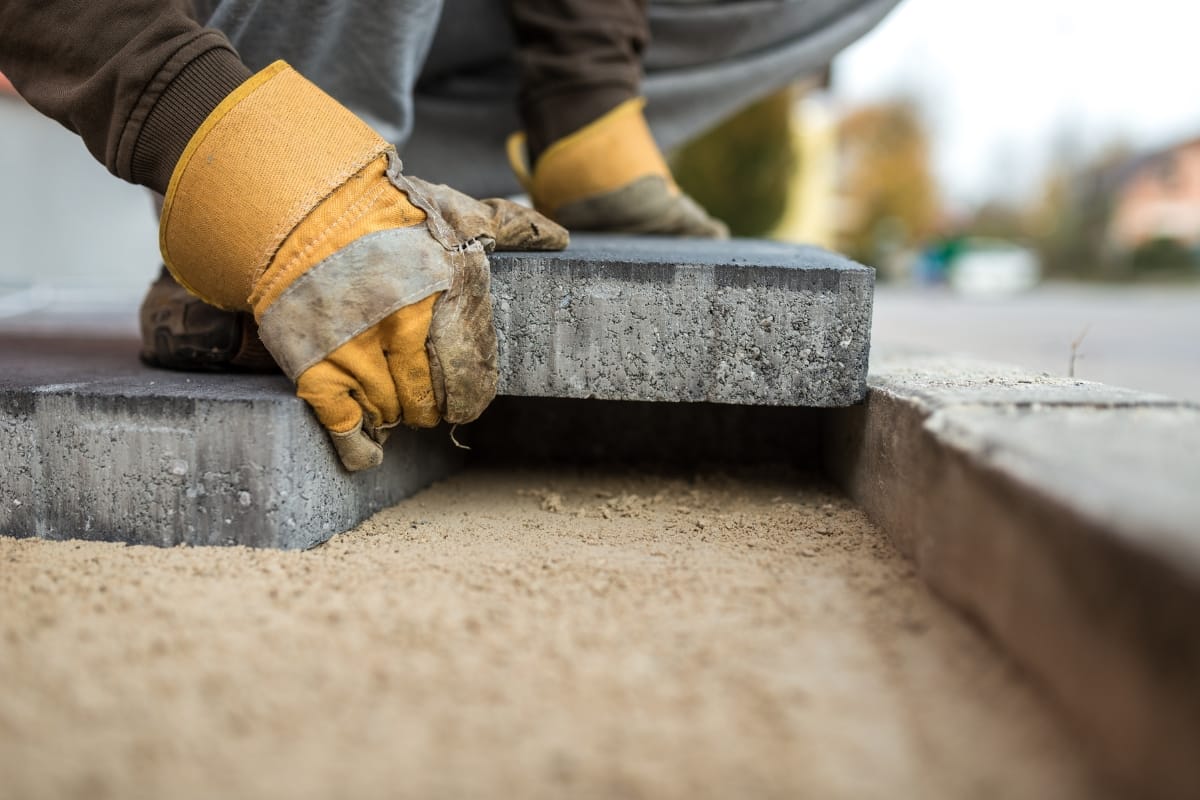
Now that you’re all set with a level sandbed, it’s time to get those pavers into place. Starting from a corner or edge, you’ll begin the satisfying work of laying each paver according to your chosen design pattern.
To keep things looking sharp, use spacers to ensure consistent gaps between the stones. Whether you’re figuring out how to lay paving stones for the first time or you’re a seasoned pro at making a paver patio, these steps will guide you to a flawless finish.
So, let’s dive into how you install a paver patio and lay a brickpatio with precision and style.
Starting From a Corner or Edge
When you’re ready to lay your pavers, starting from a corner or edge is your best bet for a crisp, clean look. This approach allows you to align your pavers with precision, ensuring that the rest of your patio follows suit.
It’s like starting a puzzle with the corner pieces; once you’ve got those in place, everything else falls into line more easily. So, take a deep breath, set that first paver down, and you’re on your way to creating an outdoor space you’ll be proud of.
As you place each paver, keep a keen eye on maintaining straight lines and consistent spacing. It’s these little details that make a big difference in the final appearance of your patio.
Remember, you’re not just laying stones; you’re crafting an extension of your living space, a place for relaxation and entertainment. By starting from the edge, you’re setting the stage for a patio that’s as functional as it is beautiful, one that beckons you to step outside and enjoy.
Placing Pavers According to the Design Pattern
Placing pavers according to your design pattern is like following a recipe for your favorite dish; it requires attention to detail and a bit of creativity. Start by laying out a section at a time, ensuring each paver aligns with your vision.
Whether you’re going for a herringbone, basketweave, or a simple stacked bond, the key is consistency. This way, you’ll achieve a harmonious look that’s both eye-catching and structurally sound.
Remember, the beauty of your patio lies in the precision of the pattern. As you lay each paver, use spacers to maintain uniform gaps, ensuring a neat and professional finish.
It’s these small gaps that will allow for a bit of give and take as the ground naturally shifts over time, keeping your patio looking perfect season after season:
| Design Pattern | Technique | Visual Appeal |
|---|---|---|
| Herringbone | Alternate directions at 45 or 90 degrees | Dynamic, directional look |
| Basketweave | Pair horizontal and vertical blocks | Classic, textured surface |
| Stacked Bond | Align edges in rows or columns | Clean, contemporary lines |
Using Spacers for Consistent Gaps
When you’re laying pavers, using spacers is like having a secret weapon for achieving that magazine-worthy look.
These handy little tools ensure each paver is evenly spaced, creating consistent gaps that not only enhance the visual appeal but also provide room for natural expansion and contraction.
It’s a simple step that makes a world of difference, giving your patio that polished, professional finish you’re aiming for.
Think of spacers as your guide to perfection. As you place each paver, the spacers help maintain that uniform look, preventing any wobbly lines or uneven spaces that could throw off your patio‘s vibe.
They’re the unsung heroes who work behind the scenes, making sure your outdoor space turns out just as you envisioned, with a smooth, cohesive surface that’s ready for backyard barbecues and sunset lounging.
Cutting Pavers to Fit
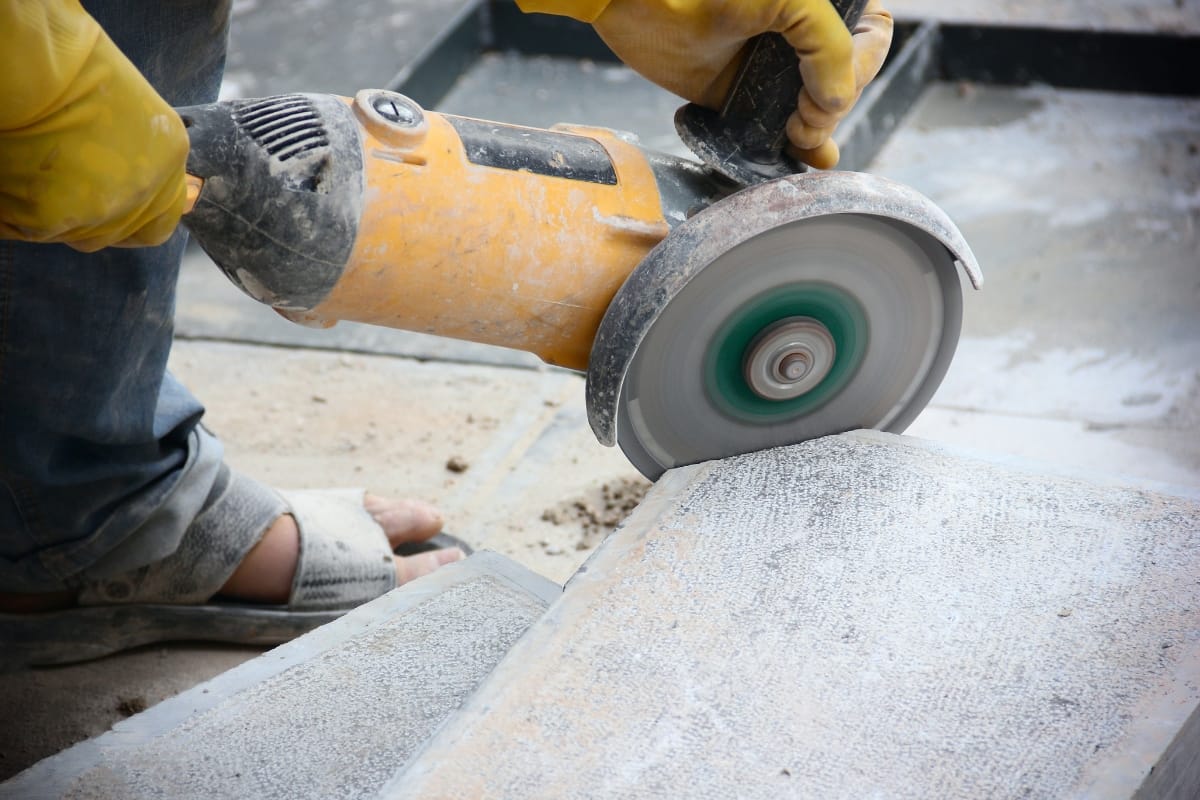
Getting your pavers to fit just right is a bit like solving a puzzle – some pieces need a trim to snugly fill the gaps. You’ll need to measure and mark your pavers before making any cuts, ensuring each one fits perfectly into your patiodesign.
Using the right tools for cutting is crucial for a clean edge and a safe installation. And when it’s time to set those cut pavers in place, doing so safely will ensure a flawless finish to your patio project.
Let’s dive into the specifics of cutting pavers to fit, so you can turn that vision of a stunning outdoor space into reality.
Measuring and Marking Pavers for Cutting
When you’re sizing up those pavers for a snug fit, think of it like tailoring a suit – precision is key. You’ll want to measure the space where each paver will go and then mark the paver itself with a chalk line or pencil.
This step ensures that when you make the cut, it’s as accurate as a well-practiced chef slicing through a tender steak, leaving you with a clean edge that’ll fit just right into your patio puzzle.
Now, before you make that first cut, double-check your measurements. It’s like reviewing your grocery list before heading to the checkout – a simple glance can save you from a return trip.
Once you’re confident in your marks, it’s time to cut. Using a wet saw or a paver splitter can make this task a breeze, giving you a professional edge that’ll make your patio look like it was done by a seasoned pro.
Using the Appropriate Tools for Cutting
Choosing the right tools for cutting pavers is like picking the perfect paintbrush for a canvas; it can make all the difference in the final look of your patio. For clean, precise cuts, a wet saw is your best friend.
It uses water to keep the dust down and the blade cool, ensuring a smooth cut through even the toughest materials. If you’re working with softer pavers, a simple paver splitter can do the job, giving you that crisp edge with less fuss.
When you’re ready to shape those pavers to perfection, remember that safety comes first. Always wear protective eyewear and gloves, and follow the manufacturer’s instructions to the letter.
Whether you’re a DIY enthusiast or a seasoned pro, using the appropriate cutting tools not only helps you achieve that seamless fit but also keeps you safe while you transform your outdoor space into a stunning retreat.
Safely Installing Cut Pavers Into Place
Once you’ve got your pavers cut to the perfect size, it’s time to ease them into their new home. Gently lower each piece into place to avoid disturbing the sandbed beneath.
It’s a bit like setting a precious gem into a ring; you want it to sit just right. If a paver doesn’t quite fit, don’t force it—trim it down a smidge more for that glove-like fit. This careful placement ensures a smooth, uninterrupted surface that’ll have your patio looking top-notch.
After placing your cut pavers, give them a soft tap with a rubber mallet to secure them in the sand. This isn’t just tapping for the sake of it; you’re ensuring each paver is firmly bedded and level with its neighbors.
It’s the final nudge they need to settle in and become part of your outdoor masterpiece. With each paver snugly installed, you’re one step closer to kicking back and enjoying your handiwork.
Installing Edge Restraints
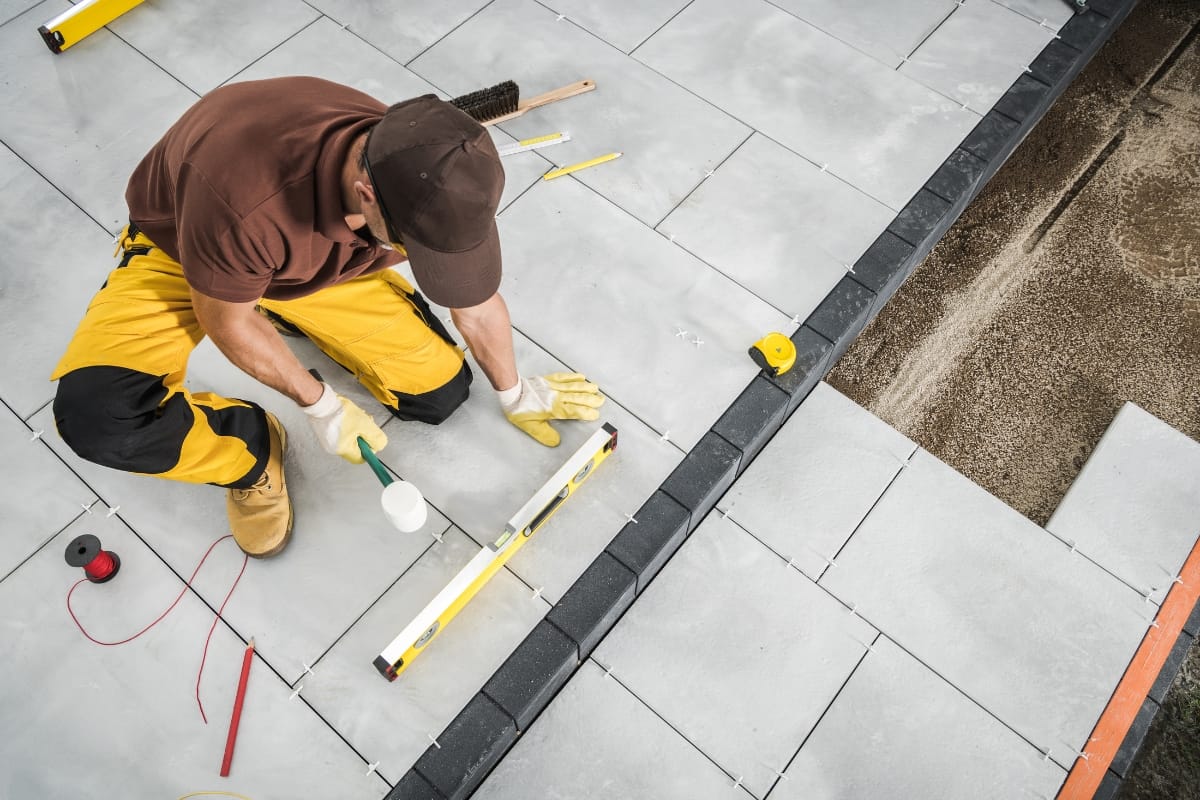
Now that your pavers are snugly laid out, it’s time to lock them in place with edge restraints. These unsung heroes keep your patio‘s shape intact, preventing any unwanted shifting or spreading over time.
You’ll explore various edging materials that not only secure your design but also add a finishing touch to your outdoor space.
Securing your edging is the final step to ensure your patio stays picture-perfect for years to come. Let’s dive into how you can choose and install the right edge restraints for a patio that’s as functional as it is stylish.
Purpose of Edge Restraints
Think of edge restraints as the guardians of your patio. They play a crucial role in maintaining the integrity and shape of your paver installation. Without them, your pavers could shift or spread over time, leading to an uneven and unsightly surface.
Edge restraints lock the pavers in place, ensuring your patio remains as pristine as the day you laid it down. They’re the finishing touch that keeps everything looking tight and professional.
Installing edge restraints isn’t just about aesthetics; it’s about longevity and safety. These barriers prevent the pavers from moving and creating tripping hazards, especially at the patio‘s edges where traffic is heaviest.
By securing your pavers with edge restraints, you’re ensuring a stable surface that can handle the hustle and bustle of outdoor living. Plus, they help define the patio‘s perimeter, giving your space a crisp, defined look that says, ‘I’m finished and fabulous’:
| Installation Step | Function | Benefit |
|---|---|---|
| Securing Edge Restraints | Prevents paver movement and spreading | Maintains patio integrity and safety |
| Defining Patio Perimeter | Creates a clear boundary | Enhances visual appeal and finish |
Types of Edging Materials
When you’re choosing edging materials for your patio, you’ve got options that blend function with style. Metal or plastic edging strips are popular for their durability and ease of installation, ensuring your pavers stay put.
On the other hand, you might opt for a more natural look with stone or brick edging, which can complement the aesthetic of your pavers and add a touch of elegance to your outdoor space.
Remember, the right edging material not only secures your patio‘s borders but also elevates the overall design. If you’re going for a sleek, modern vibe, aluminum edging can offer a clean line and a hint of shine.
For a cozier, rustic feel, wooden beams or natural stone might be your go-to, creating a seamless transition from paver to garden that feels like a natural extension of your home.
Securing Edging to Maintain the Patio Shape
Securing the edges of your patio is like putting the final piece of a puzzle in place—it’s what keeps the whole picture together.
By installing edge restraints, you’re ensuring that your pavers won’t shift or spread, maintaining the crisp, clean lines of your patiodesign. It’s a simple step, but it’s your safeguard against the natural movement of the ground that could otherwise distort your patio‘s shape over time.
Imagine your patio after a lively backyard barbecue or a season of harsh weather—without edge restraints, you might find pavers out of place, ruining the look and feel of your space.
By securing the edging, you’re not just preserving the patio‘s shape; you’re also protecting your investment and avoiding future hassles. It’s a move that delivers peace of mind, knowing your outdoor haven will stay as perfect as the day you finished it.
Edges secured, the patio‘s promise takes shape. Next, we’ll coax the sand into joints, locking each piece into the grand design.
Filling Joints With Sand
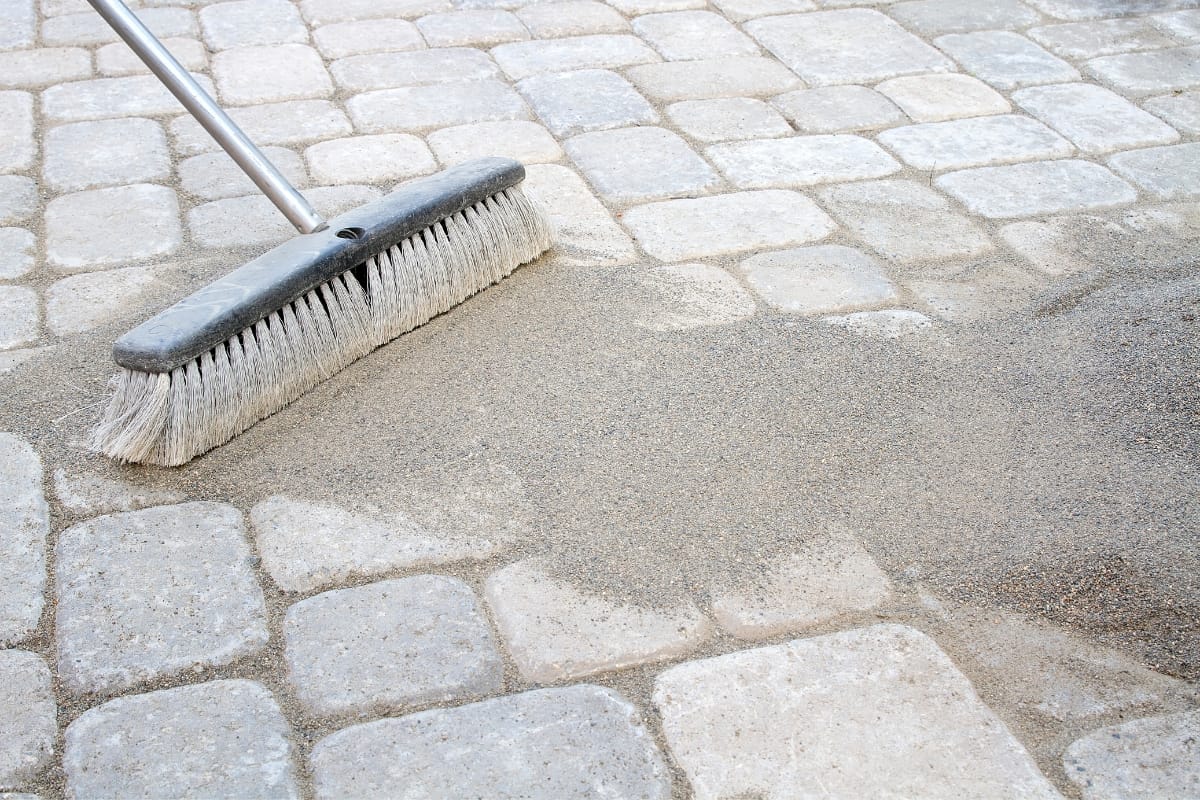
Alright, you’re almost there! Now it’s time to focus on the finishing touches that’ll lock your patiopavers in place. Spreading joint sand over the pavers, sweeping it into the gaps, and compacting the pavers to settle the sand are the final steps to ensure a solid, even surface.
These actions are crucial for the longevity and appearance of your patio, so let’s dive into how to do it right and give your outdoor space that polished, professional look.
Spreading Joint Sand Over the Pavers
Once your pavers are neatly laid out, it’s time to spread joint sand over them. This crucial step locks your pavers in place, filling the gaps and preventing shifting.
Gently pour the sand over the surface and use a broom to sweep it into every nook and cranny. You’re not just sprinkling sand; you’re ensuring the stability and longevity of your patio, so take your time to cover the entire area evenly.
As you work the sand into the joints, you’ll notice the gaps between the pavers disappearing, creating a tight, cohesive surface. This isn’t just about aesthetics; it’s about protecting your patio from weeds and erosion.
The joint sand acts as a barrier, keeping your outdoor space looking pristine and well-maintained. With a final sweep, you’ll see your patio come together, a testament to your hard work and attention to detail.
Sweeping Sand Into the Gaps
Now, you’re in the home stretch, and it’s time to sweep that sand right into the gaps between your pavers. This isn’t just busywork; it’s a crucial step to lock each paver in place, ensuring a smooth, unified patio surface.
Use a push broom to work the sand back and forth, coaxing it into every crevice. It’s a bit like coloring in the lines, where the sand binds the pavers together, creating a stable, weed-resistant surface.
As you sweep, you’ll see the magic happen—those joints filling up, making your patio look complete. If you spot any low spots where the sand hasn’t settled, don’t hesitate to pour a bit more and sweep again.
This attention to detail is what gives your patio that professional, finished look, ensuring it’s ready for all the backyard fun you’ve got planned.
Compacting Pavers to Settle Sand
After you’ve swept the joint sand into the gaps, it’s time to compact your pavers. This step is crucial for settling the sand and locking the pavers firmly in place.
You’ll want to use a plate compactor, moving it over the patio surface in a steady, controlled manner. This process helps the sand trickle down and fill every space, ensuring a tight bond that resists shifting and sagging over time.
Think of compacting as the final handshake between your pavers and the sand—it’s what solidifies your hard work into a durable, smooth surface.
As you guide the compactor across the pavers, you’re not just pressing down; you’re creating a unified structure that’ll stand up to foot traffic, furniture, and the elements. It’s the peace of mind you need, knowing your patio is set to last and look great for years to come.
With sand filling the gaps, your patio‘s puzzle locks tight. Let’s move on to those final touches that keep it sharp through seasons.
Finishing Touches and Maintenance
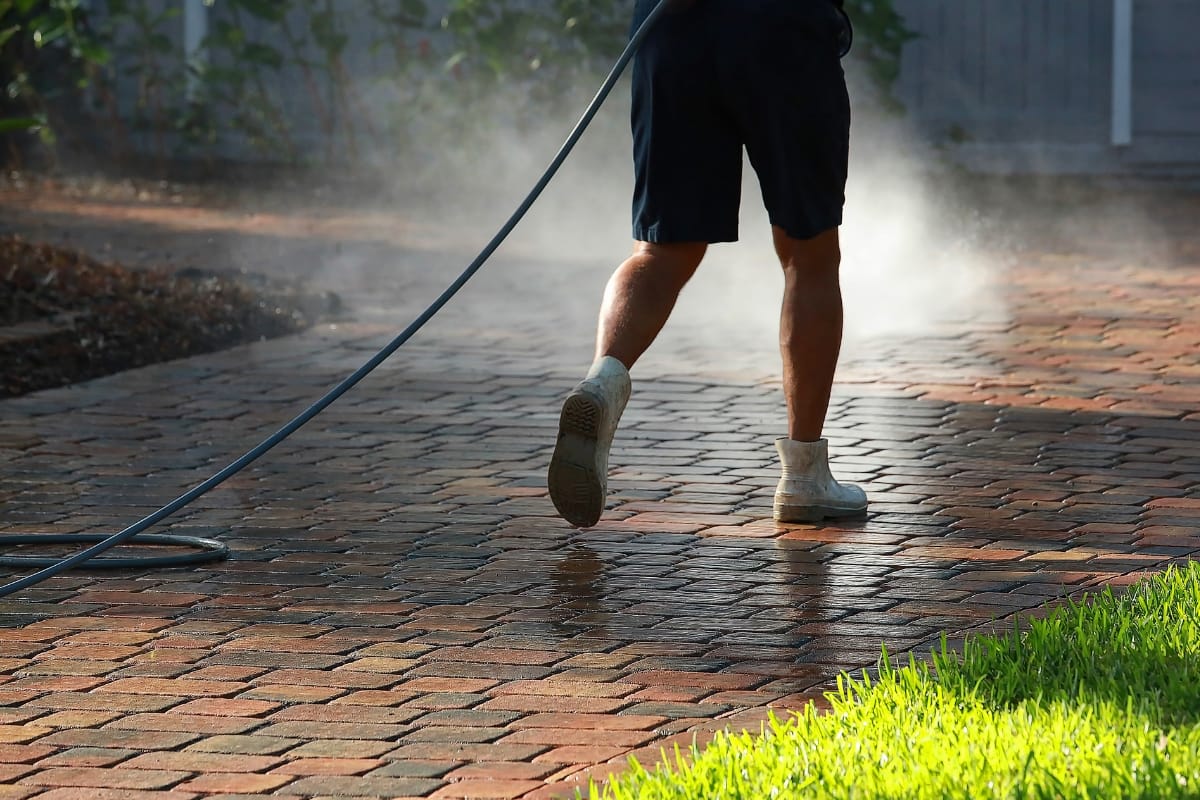
With your patio now beautifully laid out with pavers, it’s time to focus on the finishing touches and maintenance to ensure it stays in top condition.
Cleaning the patio surface is essential for keeping it looking fresh, while applying a sealant will protect your hard work from the elements. And don’t forget, a little ongoing care goes a long way in preserving the longevity of your outdoor haven. Let’s dive into these final steps to keep your patio pristine for years to come.
Cleaning the Patio Surface
After you’ve laid your pavers, keeping your patio surface clean is key to maintaining its charm. Regularly sweeping off leaves, dirt, and debris goes a long way in preserving its appearance.
For a deeper clean, you can gently hose down the area, using a mild detergent for any stubborn stains. This simple routine will keep your patio looking as good as new, ready for all the backyard gatherings you’ve got lined up.
If you notice a few pesky weeds popping up between your pavers, don’t fret. A spot treatment with a weed killer or a natural solution like vinegar can nip that problem in the bud.
And remember, the occasional rinse can prevent buildup that might lead to discoloration or moss growth. By staying on top of cleaning, you’re not just caring for your patio; you’re ensuring it remains a welcoming extension of your home.
Applying a Sealant for Protection
Sealing your patiopavers is like putting a protective coat on your favorite jacket; it’s all about keeping them safe from the elements.
A quality sealant can shield your pavers from stains, fading, and weather damage, ensuring they look great year after year. It’s a simple step that can significantly extend the life of your patio, making it a smart move for long-term maintenance.
Applying sealant isn’t just about protection; it also enhances the color and texture of your pavers, giving them a fresh, vibrant look.
You’ll want to choose a sealant that’s right for the material of your pavers and the climate you live in. This way, you’re not only safeguarding your investment but also boosting the curb appeal of your outdoor space:
- Select a sealant appropriate for your paver material and local weather conditions.
- Apply the sealant evenly, following the manufacturer’s instructions for the best results.
- Reapply the sealant every few years to maintain protection and keep your patio looking its best.
Tips for Ongoing Care and Longevity
To keep your patiopavers looking sharp and functioning well for years, regular maintenance is your best strategy. You’ll want to check for any loose or shifting pavers periodically and re-sand the joints as needed to prevent weed growth and maintain stability. It’s like giving your car a tune-up; a little effort now can save you a big headache later.
Remember, the longevity of your patio also depends on how well you handle the elements. In winter, avoid using harsh chemicals for de-icing, as these can damage the surface of your pavers.
Instead, opt for a more paver-friendly product or simply use sand for traction: this way, you’re not just keeping your patio safe, you’re also preserving its beauty and integrity.
| Maintenance Task | Frequency | Benefits |
|---|---|---|
| Re-sanding joints | As needed | Prevents weeds and stabilizes pavers |
| Checking for loose pavers | Seasonally | Ensures safety and maintains appearance |
| Using paver-friendly de-icing products | During winter months | Protects paver surface from damage |
Frequently Asked Questions
What are the benefits of choosing pavers for my patio?
Pavers offer durability, easy maintenance, and a wide range of styles, enhancing your patio‘s aesthetics and boosting property value in the Atlanta area.
How do I determine the amount of base material needed?
To calculate base material for hardscaping, measure your project area’s length, width, and desired thickness, then multiply these dimensions to get the cubic footage needed.
Can I lay pavers directly on dirt or grass?
Laying pavers directly on dirt or grass isn’t recommended; for stability and longevity, a proper base of gravel and sand is essential for preventing shifting and promoting drainage.
What’s the best way to cut pavers for a custom fit?
The best way to cut pavers for a snug fit is by using a wet saw with a diamond blade, ensuring precise and clean cuts for your hardscaping project.
How often should I re-sand the joints between pavers?
Re-sanding paver joints is typically needed every 2-3 years, but it can vary based on weather conditions and foot traffic.
Conclusion
Laying pavers for a patio requires meticulous planning, precise execution, and regular maintenance to ensure a durable and aesthetically pleasing outdoor space. From selecting the right materials and patterns to preparing the site and installing edge restraints, each step is crucial for achieving a professional finish.
Transform your outdoor space into a stunning and functional retreat with expertly laid pavers for your patio. While DIY projects can be rewarding, achieving the perfect finish often requires professional expertise.
Let Glover Landscapes bring your vision to life with precision and care with our hardscaping services. Call us at (404) 510-6437 or request a free estimate for your landscaping project through our site form. Your dream patio is just a call away—let’s make it happen together!


